How to Build Wooden Screen Doors - OldEnglishDoors

 A wooden screen entryway is the richest decision for keeping out unwanted visitors. Nonetheless, lumberyards convey just a predetermined number of plans, and having one specially crafted is restrictively costly.
Your smartest option is to purchase an entryway pack and collect it yourself. Millwork organizations make the parts from your estimations and have plans for each house style. You simply need to give the paste, screening, and a brief period. At the point when completed, you will hear the best summer sound of all: the screech of a pivot spring followed by the particular slap of a wood entryway hitting its stop.
A wooden screen entryway is the richest decision for keeping out unwanted visitors. Nonetheless, lumberyards convey just a predetermined number of plans, and having one specially crafted is restrictively costly.
Your smartest option is to purchase an entryway pack and collect it yourself. Millwork organizations make the parts from your estimations and have plans for each house style. You simply need to give the paste, screening, and a brief period. At the point when completed, you will hear the best summer sound of all: the screech of a pivot spring followed by the particular slap of a wood entryway hitting its stop.
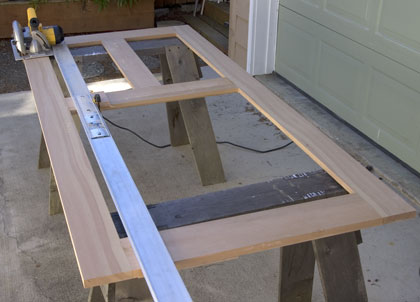
Materials and Tools
- miter saw
- table saw
- sled and etch
- screw firearm
- drill and different measured pieces
- brad nailer and nails
- clear Douglas fir (net thickness) – two pieces at 8' x 6" x 1" and one piece at 3' x 8" x 1" (our door jamb is 35-3/4" x 78")
- two 10' bits of screen stop (little trim)
- 6 feet of screen material
- staple firearm and 1/4" staples
- wood stick
- 3" pivots
- screen entryway lock
The Screen Door Summary
Wood door kits are not hard to install. When you purchase a finished door, they will save you a few bucks and provide your home with a very practical, time-consuming addition. For the door itself, the set contains all you need: mortise-and-tenon rails and stiles, screen-frame inserts and trimmings, and decorative brackets. Glue, inspection, spline, hinges, and latch kits are not included in the package, some of which may be available from the same company selling the kit. STEP 2Glue the door together, glue it together,
By dry-assembling, the parts without the glue, check the fit of the door. Put a chisel on it if the tenon doesn't fit the mortise. Dismantle the entryway, at that point stick ¼-inch-width by 11/2-inch-long hardwood dowels into the openings in the stile and fit it along with the center and base rails. Apply the paste to the joins on all the rails, at that point reassemble the whole casing. Stage 3Brace the door jamb
Utilize a 4-foot-long line or bar clasps to draw the parts together on a level plane. To forestall bowing, put a few cinches on the front face and some on the back substance of the entryway. Working rapidly before the paste sets, check the entryway for square by estimating askew from corner to corner in the two ways. Release the clasps, rack the casing until the estimations are equivalent, at that point reclamp. Wipe off overabundance stick with a sodden cloth.Step 4
Lock the joints with dowels
Drill 1?4-inch-diameter holes anywhere there is a mortise-and-tenon joint in the stiles. From the inner edge of the stile, the holes should be 1?2 inch so that the bit passes through the tenons. For 11/2-inch-long dowels, add glue and tap them into the holes you have drilled. Before removing the clamps and flushing the dowels, let the glue dry overnight. Inside the screen-opening perimeter with 3?4-inch brads, glue and nail frame molding on the front face of the door.Step 5
Assemble the screen inserts
Assemble the screen-insert boxes, using the adhesive and brads at the corners. Paint, or paint and paint, frame pieces. Enable to dry absolutely. Cut a piece of screen 2 inches wider than the insert. Use the convex wheel on the spline roller to gently push the panel to the groove on the insert. Turn the roller around and use the concave wheel to drive the rubber spline deep into the groove. Use the utility knife to trim the excess screen near the spline.Step 6
Shim the door in the opening
Stand the finished door—less the screens—in the doorway opening. Align your face with the face of the door package. Tap the wood shims around the door to keep it in place. They can preserve a 1/8-inch space along the sides and an estimated 3/16-inch space at the top and bottom.Step 7
Install the Hinges
Measure 5 cm from the bottom of the door and tighten the door and case directly onto the hook. Join the second hinges from the top of the door 5 inches down and put the third hinges in the middle.Step 8
Install the Screens and Hardware
Open the door, slide in the screen inserts, and lock them with twist buttons attached to the door's rear. Install a latch based on the middle rail of the entrance. Line the latch box to inside the door on the edge of the rail and mark the position of the spindle. Drill a hole in this symbol with a diameter of 9/16 inches. Place the lockbox in the frame, thread through the hole of the heavier spindle, then twist the box. Elevate Your Property with Heritage Craftsmanship
Looking to enhance your period home with bespoke craftsmanship? At Old English Doors, we specialise in creating custom wooden doors, windows, porches, and more - designed to reflect your home’s unique charm. Contact us today for a personalised quote and bring timeless elegance to your property.


