How to Adjust Old Style Cabinet Door Hinges

Even the sturdiest kitchen cabinets can develop sagging doors, uneven reveals, or rubbing gaps over time, especially when fitted with old cabinet hinges that predate modern adjustability features. Seasonal wood movement, everyday wear, and loose hinge screws can wreak havoc on the precise alignment needed for smooth door operation. Rather than discarding vintage doors or replacing classic hardware, learning cabinet hinge adjustment techniques can restore functionality and extend the life of your cabinetry.
In this guide, you will discover the tools required for DIY cabinet repair, understand the differences between face-frame hinges, frameless cabinet hinges, and traditional butt hinges, and follow step-by-step instructions for both modern multi-adjustment fittings and old-style hinges that lack built‑in screws. You’ll master lateral hinge adjustment, depth adjustment screw use, and simple methods for tightening or re-siting hinge mounting screws. By the end, you’ll know how to correct misaligned doors, eliminate reveal gaps, and keep your kitchen cabinets closing properly without professional intervention.
Tools & Materials You’ll Need
Before starting any cabinet hinge adjustment, gather a #2 Phillips‑head screwdriver for most hinge screws, a small hammer or rubber mallet for gently tapping hinge pins, and pliers or a dedicated hinge bender to tweak old cabinet hinges. Wooden shims—thin wedges cut from scrap lumber—help correct minor tilt or gaps behind hinge leaves. Optional supplies include replacement screws (slightly longer than the originals to grip firmer wood), wooden dowels and wood glue for repairing stripped screw holes, and safety gloves or eye protection when chiseling or drilling new pilot holes.
Understanding Cabinet Hinge Types
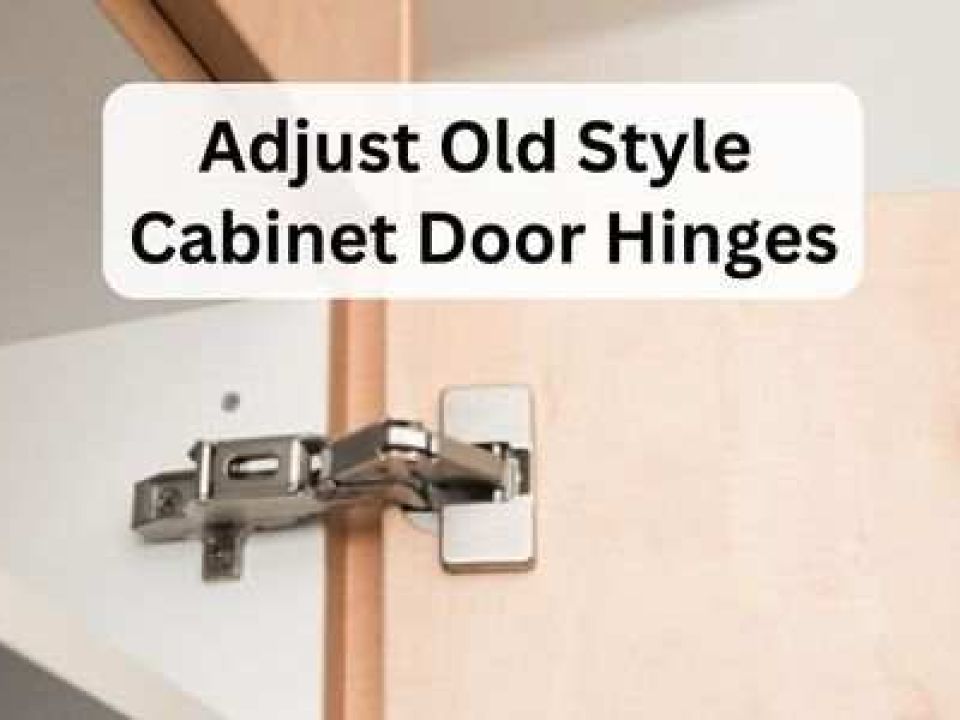
Adjusting face-frame hinges differs markedly from working on frameless cabinet hinges or simple butt hinges. Face-frame hinge adjustment typically involves three screws: one controls vertical movement, another shifts sideways, and a third governs depth. These modern adjustable hinges allow precise calibration without removing the door, making them ideal for new or retrofit installations.
Frameless cabinet hinges attach directly to the door and cabinet sides, often using Euro-style concealed fittings. They share the same trio of adjustment screws but are mounted differently and may require access inside the cabinet. Their concealed nature delivers a clean exterior look but demands careful screw orientation when making lateral hinge adjustment or depth changes.
In contrast, old-style butt hinges have only two mounting screws per leaf and no factory adjustment screws. They rely on tight screw holes and accurate positioning for alignment. Correcting misaligned doors with butt hinges involves re-siting the hinge mount, bending hinge leaves, or inserting shims. Without built-in depth adjustment, craftsmen must employ creative methods to achieve the desired reveal gap and ensure doors swing clear of frames and adjacent doors.
Preparing to Adjust Your Hinges
Begin by inspecting each cabinet door and hinge for sagging, uneven gaps, or visible rubbing. Open and close the door slowly, noting where it catches or drags. Check all hinge mounting screws on both the door frame and cabinet side; many alignment issues stem simply from loose screws. Tighten these first to rule out an easy fix.
Next, clean around the hinge area. Remove accumulated dust, grease, or paint buildup that could impede smooth movement or conceal stripped holes. If hinge pins are accessible, tap them gently with a hammer and punch to free sticky joints. Wipe away debris and apply a drop of lubricant if needed to ensure the hinge pin turns freely during adjustment.
Finally, identify hinge type—face-frame, frameless, or butt hinge—and decide which adjustment method applies. Document your starting reveal gap with a pencil mark on the framework to track progress. Having a consistent reference will prevent over-adjustment and help you return to your original baseline if needed.
Adjusting Modern Cabinet Hinges
Adjusting Up or Down
Modern face-frame hinges feature an oval vertical slot on the hinge mounting plate. Loosen the two mounting screws in that slot just enough to slide the door up or down. Use gentle pressure on the door’s top edge to lift or lower it by small increments. Once the door sits at the desired height and the reveal gap above and below is uniform, retighten the screws securely. Check that the door closes flush against any magnetic catches or bumpers.
Adjusting Side-to-Side
Most European-style concealed hinges include a lateral adjustment screw on the hinge arm. Turning this screw clockwise shifts the door closer to the cabinet side, while counterclockwise moves it away. To correct misaligned doors or uneven side gaps, adjust both the top and bottom hinges by the same amount. Make small quarter-turns, then close the door to inspect the reveal. Repeat until the gap between the door and frame is even along the entire height.
Adjusting Depth (In or Out)
Depth adjustment screws are typically located at the rear of the hinge arm, farthest from the cabinet side. Rotating this screw moves the door in or out, controlling how deeply the door hides the cabinet face. This adjustment corrects rubbing against frames or adjacent doors. After each minor turn—usually no more than half a rotation—close the door to confirm that it sits squarely without twisting or binding. Retighten any loosened screws on the hinge once depth is set.
When working on frameless cabinet hinges, the same three screws govern up/down, lateral shift, and depth, but they may be hidden behind the hinge cover. Remove the plastic cap or open the hinge fully to access these screws. The procedure mirrors face‑frame adjustments, but ensure that shims or a secondary support hold the door steady when loosening mounting screws.
Adjusting Old-Style (Non-Adjustable) Hinges
Identifying the Issue
With butt hinges, misalignment typically manifests as sagging on the hinge side, uneven reveals along the top or bottom, or doors that rub against frames. First, determine whether the problem is vertical, horizontal, or depth-related by observing where the door hangs or drags.
Tightening and Re-siting
Begin by fully tightening all hinge mounting screws. If screws spin in place, wood has worn away and needs repair. Remove the hinge leaf from the cabinet or door, then press a wooden dowel coated in glue into the old screw hole. Once dry, re-drill a pilot hole slightly smaller than your new screw diameter and fasten the hinge leaf using longer screws. This method ensures a solid grip in the wood and often corrects minor sagging.
For larger corrections, unmount the hinge, mark new pilot positions slightly higher or lower on the door or frame, and remount the hinge leaf. Ensure the hinge knuckles align precisely when the door is closed, preventing binding.
Bending & Shimming
When vertical or depth adjustment is too subtle for re-siting alone, use a hinge bender or sturdy pliers to flex the hinge leaf ever so slightly. Gently bend the mounting leaf outward or inward to change how the door sits against the frame. This technique requires a light touch: too much force can fracture the hinge steel or deform the door alignment.
If horizontal gap correction is needed, insert a thin wooden shim between the hinge leaf and mounting surface before refastening screws. Trim the shim so that only the desired area receives extra space, then tighten screws firmly. Shims are particularly useful for correcting reveal gaps on tall cabinet doors with multiple hinges.
When to Replace Hinges
After repeated adjustments or if hinges exhibit significant wear—loose knuckles, bent leaves, or stripped screw holes—consider replacing old cabinet hinges. Adding a third hinge on taller doors can share load and reduce future sagging. Where period authenticity matters, select reproduction butt hinges that match the original hardware’s design and finish.
Troubleshooting Common Issues
Crooked Rows of Doors
When multiple cabinet doors appear misaligned in a continuous run, place a straightedge or laser level across their faces. Starting at one end, adjust the first door using the methods above, then move sequentially down the line, making uniform lateral and vertical tweaks. Small incremental changes ensure a consistent reveal gap across all doors without over-correcting any single hinge.
Stripped Screw Holes
Persistent loose screws often indicate stripped holes. Drill out the old hole to remove debris, then fill with a dowel or matchstick coated in wood glue. Once set, trim flush and drill a new pilot hole. Reinsert the screw, which will now bite into fresh wood and hold firmly.
Seasonal Wood Movement
Solid wood doors expand in high humidity and contract during dry seasons, leading to sticking or new gaps. Anticipate seasonal wood movement by leaving slightly larger reveals in summer months and retightening mounting screws in winter. If doors bind in humid weather, open them fully and tap hinge pins down to increase clearance until conditions stabilise.
Soft-Close Mechanism Not Holding
If your kitchen cabinets incorporate a soft-close feature that fails to engage, first confirm the mechanism is properly seated on the hinge arm. Some systems include a tension adjustment screw; tighten or loosen to modify closing speed. Cleaning tracks and replacing worn dampers can restore functionality without hinge replacement.
How Old English Doors Can Help
Old English Doors specialises in heritage-accurate joinery and hardware solutions for both modern and vintage cabinetry, offering a suite of services to guide DIY renovators and homeowners through every step of hinge adjustment and restoration:
- Custom Hinge Templates: Drawing on archival measurements and bespoke jigs, we craft precision hinge templates that guarantee perfect alignment on face-frame and frameless constructions.
- Specialist Restoration Support: Whether you’re reviving original butt hinges or recalibrating modern multi-adjust fittings, our experts advise on screw selection, shim placement, and hinge bending techniques to preserve cabinet integrity.
- On-Site Calibration & Seasonal Tuning: From initial installation to annual humidity adjustments, our maintenance service ensures doors remain square, gaps stay uniform, and soft-close mechanisms perform reliably.
By partnering with Old English Doors, you gain access to craftsman-grade expertise in period-correct hardware sourcing, wood movement management, and ongoing tuning services, keeping your cabinet doors closing smoothly and looking their best.
Conclusion
Properly adjusted cabinet hinges transform creaky, misaligned doors into smooth‑operating fixtures that enhance both the function and appearance of your kitchen cabinets. Whether working with modern adjustable fittings or old style cabinet hinges, small changes—tightening screws, re‑siting hinge leaves, or inserting shims—can resolve sagging cabinet doors and misaligned reveals. By understanding face‑frame hinges, frameless cabinet hinges, and butt hinge adjustment techniques, DIY enthusiasts can tackle most alignment issues with a Phillips‑head screwdriver and a bit of patience.
Regular inspection—especially after seasonal wood movement—ensures that doors continue to close properly and prevents minor misalignments from escalating into major repairs. When faced with stripped holes or worn hardware, don’t hesitate to employ dowel repairs or replace hinges. With careful workmanship and the right tools, even vintage cabinet doors can regain their original elegance and functionality.
Modern European-style face-frame and frameless hinges allow all three adjustments—vertical, lateral, and depth—without door removal. Old-style butt hinges typically require partial unmounting for precise re-siting or shimming.
Inspect hinge mounting screws and alignment at least once a year, and after major seasonal changes in humidity, to catch loose screws or wood movement before doors begin sagging.
Loose screws usually indicate stripped holes. Repair by inserting glue-coated wooden dowels or using slightly longer replacement screws to establish a firmer grip in the substrate.
Vertical misalignment is best corrected by loosening the vertical adjustment screws on modern hinges, or by re-siting and shim-bending the hinge leaf on old-style hinges. Make small shifts until the door swings clear of the frame without gaps.


